Angular or better known as a modern web developer’s platform that lets you develop across all platforms, reuse your code, achieve the maximum speed possible on the web platform using Web Workers & server-side rendering, and allow you better control over scalability by building data models on RxJS, Immutable.js, and create features quickly with simple and declarative templates.
Having spent a reasonable amount of time building Angular applications, you probably know how it works. But what if we tell you there is more to learn and see with these Angular features which you might have missed?
Let’s see what we are talking about!

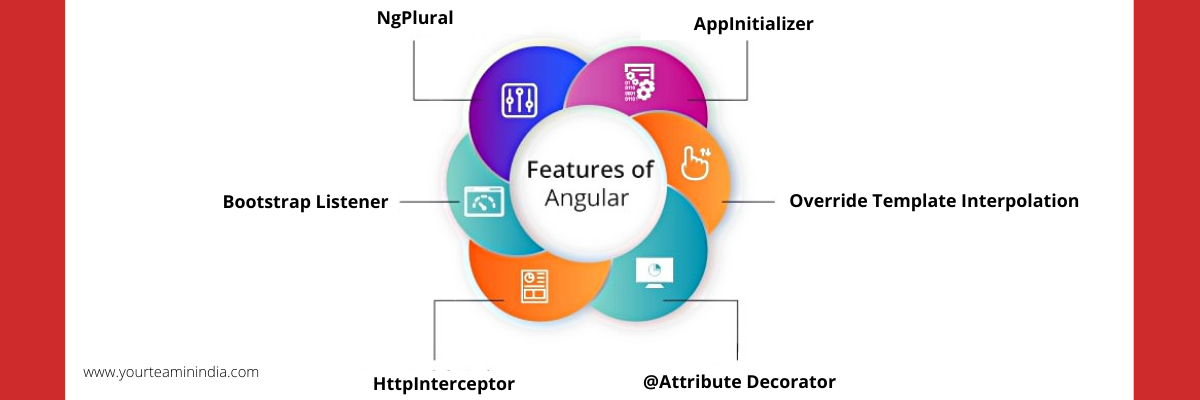
- NgPlural
NgPlural and NgPluralCase directives add or remove DOM elements based on the numeric values. However, pluralization is a problem in its sphere, and angular developers must always define grammar precisely and correctly in the apps based on singular or plural value.
Some might even use the (s), like this:
1 component(s) removed
3 component(s) removed
Angular has to deals with this concern in its NgPlural directive. As mentioned earlier, NgPlural adds or removes DOM sub-trees on the basis of the numeric value. Moreover, it even displays DOM sub-trees that match the switch expression value. And, if not, DOM sub-trees match the pluralization category of the switch expression.
To utilize this directive, you must provide a container element to set the [ngPlural] attribute to a switch expression. Also, [ngPluralCase] displays inner elements based on their expression.
<p [ngPlural]="components">
<ng-template ngPluralCase="=1">1 component removed</ng-template>
<ng-template ngPluralCase=">1"> components removed </ng-template>
</p>
Here, (s) are removed using the NgPlural directive while displaying several ‘components removed.’
// if 1 component
1 component removed
// if 5 components
5 components removed
- AppInitializer
Initially, when you are about to start your Angular app, you might need some code - like load cache, settings, load configuration, or maybe some check-ins. That’s when we need the AppInitializer. It is a function that is executed when the app is initialized. Also, it is quite easy to use.
Here, we are running the runsettings function on the Angular app:
function runSettingsOnInit() {
…
}
So, we will go to the main module, AppModule, to add it to the providers section in the NgModule decorator, like this:
@NgModule({
providers: [
{ provide: APP_INITIALIZER, useFactory: runSettingsOnInit }
]
})
Must read: Step by Step Guide to Hire Angular Developers
- @Attribute Decorator
Developers know that we use Module, Components, and Directive decorators in the Angular app. So, with Attribute decorator, we pass static string by eliminating change detection check on it. So, you can check once the values of the Attribute decorator and never recheck it. It is quite similar to that of the @Input decorator.
@Component({
...
})
export class BlogComponent {
constructor(@Attribute("type") private type: string ) {}
}

- Location
You can use the Location service to get the URL of the current browser window. Location either persists to the URL’s path or the URL’s hash segment, depending on which LocationStrategy you are using.
Using Location, you can go to the URL, change the browser’s URL, replace the top item on the platform’s history stack, navigate back in the history of the platform, and even navigate forward in the same.
All you need to do is simply inject the Location Service from the CommonModule to make use of it.
import { Location } from "@angular/common"
@Component({
...
})
export class AppComponent {
constructor(private location: Location) {}
navigateTo(url) {
this.location.go(url)
}
goBack() {
location.back()
}
goForward() {
location.forward()
}
}
5. Meta
Most of the things that are rendered by the Angular application are within the index.html. That even includes the meta tags of the application. Angular has a Meta service in the @angular/platform browser, enabling you to set meta tags from the components. Also, metas are critical from the SEO point of view.
Meta elements help you know more about the web page, which appears in the search engines to categorize the page aptly. You just need to import Meta from @angular/ platform-browser to inject your component in it.
import { Meta } from "@angular/platform-browser"
@Component({
...
})
export class BlogComponent implements OnInit {
constructor(private meta: Meta) {}
ngOnInit() {
meta.updateTag({name: "title", content: ""})
meta.updateTag({name: "description", content: "Lorem ipsum dolor"})
meta.updateTag({name: "image", content: "./assets/blog-image.jpg"})
meta.updateTag({name: "site", content: "My Site"})
}
}
- Bootstrap Listener
Do you know you can listen on when a component is bootstrapped? Yes, Bootstrap Listener helps you do that like this:
APP_BOOTSTRAP_LISTENER
Every callback provided through this token is called for every component which you have bootstrapped. Also, there are multiple reasons why you should listen to the bootstrap. The router module utilizes it to destroy and create components on the basis of route navigation.
You will need to type APP_BOOTSTRAP_LISTENER, to add it to the providers section in the AppModule and the callback function.
@NgModule({
{
provide: APP_BOOTSTRAP_LISTENER, multi: true,
useExisting: runOnBootstrap
}
...
})
export class AppModule {}
Read our other post to know about the best practices for Clean and Performant Angular Apps
- Override Template Interpolation
The default template interpolator is used to display the properties in the component. So, if we place the property member between the start of this, you will see it rendered on browser DOM.
We can simply override the default encapsulation start and end delimiters using our own symbols. All you need to do is specify the same in the interpolation property in the Component decorator.
@Component({
interpolation: ["((","))"]
})
export class AppComponent {}
The interpolation in the template will be:
"(())" no longer "".
@Component({
template: `
<div>
((data))
</div>
`,
interpolation: ["((","))"]
})
export class AppComponent {
data: any = "dataVar"
}
In place of ((data)), you will see “dataVar” rendered.
- Http Interceptor
This robust feature in Angular intercepts HttpRequest and handles them. Most of the interceptors transform the outgoing request before passing it to the next one in the chain. For which, it calls
next.handle(transformedReq).
There are some cases (really rare), when the interceptors want to completely handle the request themselves without really delegating it to the rest of the chain.
HttpInterceptor is used in:
- Modifying headers
- Fake backend
- Caching
- Authentication
- URL Transformation
Also, it is quite easy to use - create the service and then implement the interface HttpInterceptor.
@Injectable()
export class MockBackendInterceptor implements HttpInterceptor {
constructor() {}
intercept(req: HttpRequest<any>, next: HttpHandler): Observable<HttpEvent<any>> {
...
}
}
Now, you will have to insert it into the main module.
@NgModule({
...
providers: [
{
provide: HTTP_INTERCEPTORS,
useClass: MockBackendInterceptor,
multi: true
}
]
...
})
export class AppModule {}
The Crux
Hope you have learned something new about Angular apps today! We understand that Angular app development is easy, but Angular itself is gigantic and complicated. So, there is always something new to learn about it. So, now that you know about it, use it and see how it works.


