Summary - Learn what makes Angular, the open-source framework by Google, a top choice amongst developers for creating eCommerce application
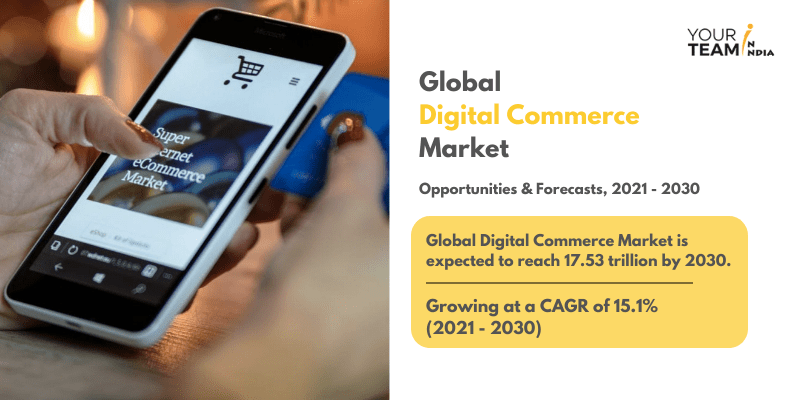
The increasing smartphone and internet penetration has boomed the growth of digital commerce and online shopping, and the recent global lockdown has only added fuel to this growing market. A recent survey shows that the digital commerce market is expected to reach $17.53 Trillion by 2030.

So if you are a business planning to start your eCommerce website, now is the time to enter the market, and Angular is the technology to pick. Low-code framework, angular eCommerce templates, MVC architecture, and unit testing capabilities are among the many reasons to build an angular eCommerce app.
But what makes Angular eCommerce stand out in e-commerce application development?
Let’s find out.
Top 11 Reasons to Choose Angular eCommerce Web Application
A recent report by Statista how's that Angular is amongst the top 5 most used web frameworks among developers worldwide as of 2022. 20.39% of developers are choosing angular eCommerce app development process to build an online store, and here is why-
1. Low code framework
Angular is a low-code framework. It has extensive features that are simple to use, easy to understand, and require minimal coding, which makes e-Commerce store & web app development quick and hassle-free. The angular framework is embedded with MVC (model-view-controller), which reduces the time and effort required for app development process.
2. Maintains high-quality web pages
With its awesome coding flexibility, Angular allows you to build your eCommerce website like an expert. It eliminates unnecessary web pages and allows you to maintain a high-quality e-commerce store to attract more customers. Considering headless ecommerce platforms can further enhance this capability.
3. SEO-optimized
Being a Google framework, Google Analytics and Google Webmasters can be easily embedded in an Angular Js application. You can track page performance, visitors' interactions & customer engagement using these analytics tools to build effective SEO strategies. You get better customer insights & market analysis to build a robust e-commerce app. A trusted Angular development company can help you create high-quality web pages.
4. MVC design architecture
Angular uses MVC architecture to build an engaging user interface (UI) for your e-commerce store. The MVC architecture splits the website components, enabling the angular developer to quickly create them with optimized codes to build scalable and high-performing e-commerce web applications.
5. Enhanced web security
Angular JS comes with in-built security protection against cross-site scripting & HTML injection attacks, delivering superior security. Angular safeguards your customer's data against malware and fraud, enabling them to carry out online transactions easily.
With its safe code variable and security attributes, Angular helps you meet your security standards in your e-commerce app.
Recommended Read: Step by Step Guide to Hire Angular Developers
6. Effective testing cycle
Angular delivers unit testing setup, enabling the QA team to speed up the testing process while bringing more accuracy. With Angular, you can run codes and test applications effectively. As it provides deep insights into errors, you can fix the bugs at the source to build a robust e-commerce website.
7. Beautiful e-Commerce templates
An attractive e-commerce web app needs beautiful designs, which Angular helps you build. Angular offers amazing templates empowering you to build an engaging and interactive application. Angular e-Commerce templates come with unique features for design, animation, content style, and navigation, helping you create an attractive user interface with ease.
8. Improved user interface
As Angular extends the HTML (a declarative language) attributes with more features, it's easier for developers to design attractive web pages. It's two-way data binding enables angular developers to make edits & changes to the underlying data using the UI to speed up the development process.
9. Easy workflows
The modular architecture of Angular empowers developers to build user-friendly e-commerce web applications quickly by splitting the development process into simple modules. The dependency injection (DI) further improves the application functionality, enhancing the overall performance.
10. Strong community support
There is a strong & growing community of developers ready to support your angular eCommerce project development.
You will find experienced experts that are available to help you resolve bugs and error issues. Besides you will also find a lot of online resources on Angular to resolve your app development queries.
11. Code consistency
Angular CLI and documentation style guide drive consistency at the pioneer level. Code consistency brings benefits like rich templates, ease of app scalability, effective maintenance & upgradation of code.
How to Setup an Angular E-Commerce Project

What you'll need:
Let's begin by installing Angular CLI, a tool that will automate many development tasks. Open a terminal to install the tool and type the following command:
<code>npm install -g @angular/cli</code>
Post installation, create a new project with the following command:
<code>ng new snipcart-angular</code>
You will see a prompt asking your permission to enable strict mode. Select yes to enable some settings to find errors and bugs in advance.
You will now see your project repo in your directory. Type the below-mentioned commands to access it:
cd snipcart-angular

ng serve --open
ng serve will build the app, and the -open option will open the browser to http://localhost:4200/. You now should see Angular's generic template page.
Customize the HTML template
Once the general project setup is done, you can begin to customize it!
The first step is to open the app.component.ts file and change the value of the title property for 'Ice Cream Store.'
Then, open the app.component.html file and replace all of the template sections with <h1></h1>. The result would look like this:
<h1></h1>

<router-outlet></router-outlet>
Then, instantly reload the browser to display only the new title.
Customize the stylesheet
We will leverage Angular's Material Design components for styling. These components by the Material team are an implementation of Material Design that allows us to design, build & test our e-commerce web app quickly.
We will use the following command to install Material UI: ng add @angular/material
We can then replace src/app.component.scss.
Creating mock products
Now we will create a simple mock-products.ts file in our root component:
import { Product } from './core/product';

import { Size } from './core/size';
export const PRODUCTS: Product[] = [
 {
 id: 1,
 name: 'Ice Cream',
 imageUrls: ['../assets/ice-cream-prune.svg', '../assets/ice-cream-cherry.svg', '../assets/ice-cream-squash.svg'],
 price: 10,
 flavors: [
 { name: 'prune', color: '#5A188E' },
 { name: 'squash', color: '#F88532' },
 { name: 'cherry', color: '#E91E63' },
 ],
 sizes: [Size.SMALL, Size.MEDIUM, Size.LARGE],
 },
 {
 id: 2,
 name: 'Popsicle',
 imageUrls: ['../assets/popsicle-lime.svg', '../assets/popsicle-lettuce.svg', '../assets/popsicle-cherry.svg'],
 price: 8,
 flavors: [
 { name: 'lime', color: '#00CACA' },
 { name: 'lettuce', color: '#80DC0B' },
 { name: 'cherry', color: '#E91E63' },
 ],
 sizes: [Size.SMALL, Size.LARGE],
 },
 ];
We will create a core folder containing our TypeScript product interface and a flavor and size interface we will use to fulfill our ice cream customer's wishes better!
// core/product.tsimport { Flavor } from "./flavor";
import { Size } from "./size";
export interface Product {
 id: number;
 name: string;
 imageUrls: string[];
 price: number;
 flavors: Flavor[];
 sizes: Size[];
 }
// core/flavor.ts
export interface Flavor {
 name: string;
 color: string;
 }
// core/size.ts
export enum Size {
 SMALL = "small",
 MEDIUM = "medium",
 LARGE = "large",
 }
Creating a homepage component
Type the following command: ng generate component homepage. in the terminal.
We can start by adding props to the homepage. This will display our app title on our website. Now, we can create two properties for our app title and subtitle.
// homepage.component.ts
@Component({
 selector: 'app-homepage',
 templateUrl: './homepage.component.html',
 styleUrls: ['./homepage.component.scss']
 })
 export class HomepageComponent {
 title = 'Infinite summer ice cream store';
 subtitle = 'Which one do you want?';
 }
Then let's add the HTML templating in the corresponding file:
<!-- homepage.component.html -->
<div class="header" fxLayout="column" fxLayoutAlign="center center">
 <h1 class="jumbo"></h1>
 <h2></h2>
 </div>
To display the homepage view, we add the following line to the component:
<!-- app.component.html -->
<app-homepage></app-homepage>
We can now see the title and subtitle! But we also want to add our products to the e-commerce homepage's header.
Recommended Read: Difference between Angular and AngularJS
Display products: introducing directives
Now that we have a nice header and some products ready, it's time to display them on the website. To improve reusability, we will do it in a separate component.
Create the product-display component in your terminal by typing the following commands of Angular CLI: ng generate component products.
This component will allow us to import the products easily. Type the following lines in product-display-component.ts:
<code class="language-ts">import { PRODUCTS } from '../mock-products';</code>
Now define the attributes in the component class with the following lines:
export class ProductsComponent implements OnInit {

  products = PRODUCTS;

}
Now, we're ready to create a product component to provide more information to our customers. ng generate component product.
Open the newly created product.component.ts file and replace its content with the following:
import { Component, Input, OnInit } from '@angular/core';

import { Product } from '../core/product';
@Component({
selector: 'app-product',
templateUrl: './product.component.html',
styleUrls: ['./product.component.scss']
})
export class ProductComponent implements OnInit {
@Input() product: Product | undefined;
imageUrl: string = "";
 ngOnInit() {
 this.imageUrl = this.product?.imageUrls[0] ?? '';
 }
 }
Adding @Input decorator allows us to declare input properties. This means the component now receives value directly from its parent component.
When we review what we just created, we will see:
- An input property product that binds to the Product object we created in core.
- An imageUrl property which we'll use to display our product's images.
With the line
<code>this.imageUrl = this.product?.imageUrls[0] ?? ''; </code>
we then assign to imageUrl the value of the first image in the imageUrls array if it exists, and do so within the ngOnInit method.
ngOnInit is an Angular lifecycle method that gets called after component initialization. Since the component is initialized, the input props, in our case, the product prop, are populated, and we can access it. This is what allows us to populate the property.
Once our component properties are defined, we now can add them to our HTML (product.component.html):
<ul>

    <app-product *ngFor="let p of products" [product]="p"></app-product>

</ul>
The *ngFor directive allows us to modify the DOM structure by–you guessed it–looping over the elements of the products list and creating the specified HTML node for it (in our case, the app-products node).
Angular's official documentation defines directives such as *ngFor Angular's official documentation as "classes that add additional behavior to elements." In that sense, components are directives because they define additional behavior to a standard HTML template.
Create a product page: introducing angular routing
Open app-routing.module.ts and insert the following into routes:
const routes: Routes = [

  {path: "**", component: HomepageComponent},

];
We can now add a dynamic route.
const routes: Routes = [

  {path: "product/:id", component: ProductPageComponent},

  {path: "**", component: HomepageComponent},

];
The "**" path is a wildcard route, generally used for 404 pages. We should add the wildcard route last; otherwise, it will override the other routes.
In app.component.html, <router-outlet></router-outlet> will display the component related to the route. So in your browser, you can now go to http://localhost:4200/ and it will point to our homepage!
Create product pages component: discovering services
Components are responsible for data presentation. They should only access the application data indirectly to improve our application modularity. Instead, they should interact with services that handle data access.
Let's refactor our product component to use a service to handle data access. For now, this service will use mock data.
Enter the following command in the terminal: ng generate service product.
In the newly created product.service.ts file, add the following content:
import { Injectable } from '@angular/core';

import { PRODUCTS } from './mock-products';
@Injectable({
providedIn: 'root'
})
export class ProductService {
constructor() {}
 getProducts(): Product[] {
 return PRODUCTS;
 }
 }
The getProducts method returns our mock data. Now, in products.component.ts, replace the mock products assignation by a call from product service:
export class ProductsComponent implements OnInit {

  products: Product[] = [];
constructor(private productService: ProductService) {}
getProducts(): void {
this.products = this.productService.getProducts();
}
 ngOnInit() {
 this.getProducts();
 }
 }
We have done four things here:
- We've replaced the value of products with an empty array.
- We've injected the productService in our constructor.
- We've defined a getProducts method in our component that handles the products' logic.
- We've called this method in the ngOnInit lifecycle method.
For our product page, we will need data about a single product. Let's add a getProduct method to our product service to fetch this data:
// product.service.ts
getProduct(id: number): Observable<Product | undefined> {
 const product = PRODUCTS.find(product => product.id === id);
 return of(product);
 }
This method returns an observable. They are used in Angular for event handling and, as in our case, asynchronous programming. We will see how to fetch observable values when designing our product page.
We'll use this method in our product component to display the product content: ng generate component product.
// product.component.ts

import { Component, Input, OnInit } from '@angular/core';

import { Product } from '../core/product';
@Component({
selector: 'app-product',
templateUrl: './product.component.html',
styleUrls: ['./product.component.scss']
})
export class ProductComponent implements OnInit {
@Input() product: Product | undefined;
imageUrl :string = "";
 ngOnInit() {
 this.imageUrl = this.product?.imageUrls[0] ?? '';
 }
 }
In the TypeScript file, we added a product input property for the inserted product and an imageUrl property, which we bind to the component's image src.
<!-- product.component.html -->
<div [routerLink]="'product/' + product?.id">
 <h2></h2>
 <img [src]="imageUrl" />
 </div>
We also added a router link to a product page in the HTML, which we still need to define. Let's do it now.
Add product pages
We enable users to select the type and size variant they want for their products.
Along with an imageUrl property similar to the one we added to the product component, let's add a getProduct method that will get the dynamic parameter from our route and use it to call the corresponding method we defined in the product service:
// in product-page.component.ts

 imageUrl: string = '';

 product: Product | undefined;
 getProduct(): void {
 const id = Number(this.route.snapshot.paramMap.get('id'));
 this.productService
 .getProduct(id)
 .subscribe((product) => (this.product = product));
 }
We can see that the method calls our product service getProduct method and subscribes to the observable value. When the value from getProduct gets returned, it will be assigned to the product property.
Once we have all of the required data, it's time to display our product name, image URL, and price:
<h1></h1>

<img [src]="imageUrl" />

<p>Price: </p>)
<h1></h1>
<img [src]="imageUrl" />
<p>Price: </p>
<button
class="snipcart-add-item"
[attr.data-item-id]="product?.id"
[attr.data-item-price]="product?.price"
[attr.data-item-url]="'product/' + product?.id"
[attr.data-item-image]="imageUrl"
[attr.data-item-name]="product?.name">
Add to cart
</button>When you click the buy button, Snipcart's checkout window should open, and you should see your product.
Choosing the Right Angular Development Company.
Reading the aforementioned factors, one can say that selecting angular for e-commerce is the right choice. Knowing that Google consistently upgrades this framework with better capabilities only adds more confidence in choosing Angular.
But choosing the right technology is only the beginning; you must also have an experienced angular development company to build a robust web application with interactive features to deliver a high user experience.
Get in touch with our dedicated angular experts to learn more about how your business can achieve remarkable growth from our Angular and AngularJS development services. Just contact us and discuss your requirements for free.


